
I wanted to see if I could deploy infrastructure with Terraform via Azure Pipelines. To my surprise, there are Terraform extensions in the Azure Pipelines marketplace. These plugins allow me to get up to speed and achieve my goal quickly. This guide is not the only way to perform this integration but will allow you to get started. Therefore, I suggest modifying the steps and process to fit your needs.
Create a Project
First, you will need to create a new project within Azure DevOps. After logging into your DevOps organization, click Create Project to the right.

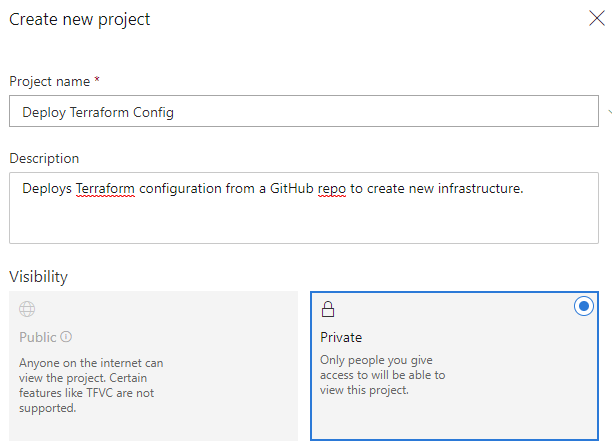
You will be presented with a quick project configuration box to complete. I named my project ‘Deploy Terraform Config’ as shown in the example.
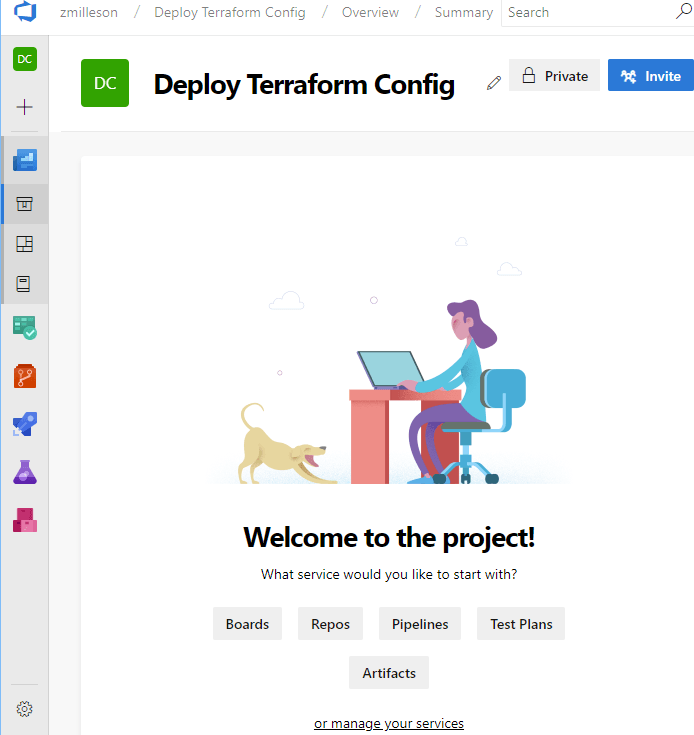
Subsequently, your new project will show up and ask what services that you want to start with. This demo will use the Pipelines service. In addition, you may also use the Repos service if you didn’t already have your Terraform in an external repo.
Create a Build in Azure Pipelines
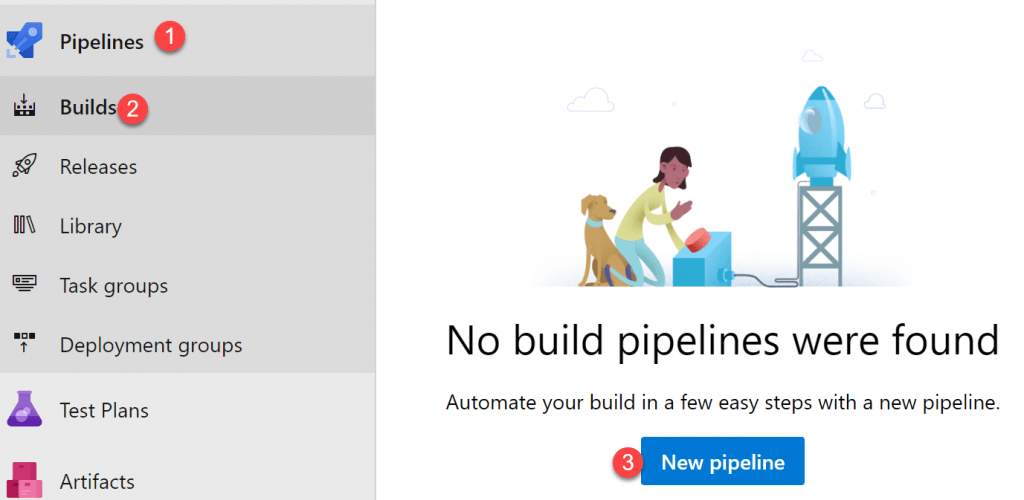
Next, I will create a new build pipeline. In the left menu, click Pipelines and then Builds. It will say there were no build pipelines found. Click ‘New Pipeline’ to proceed.
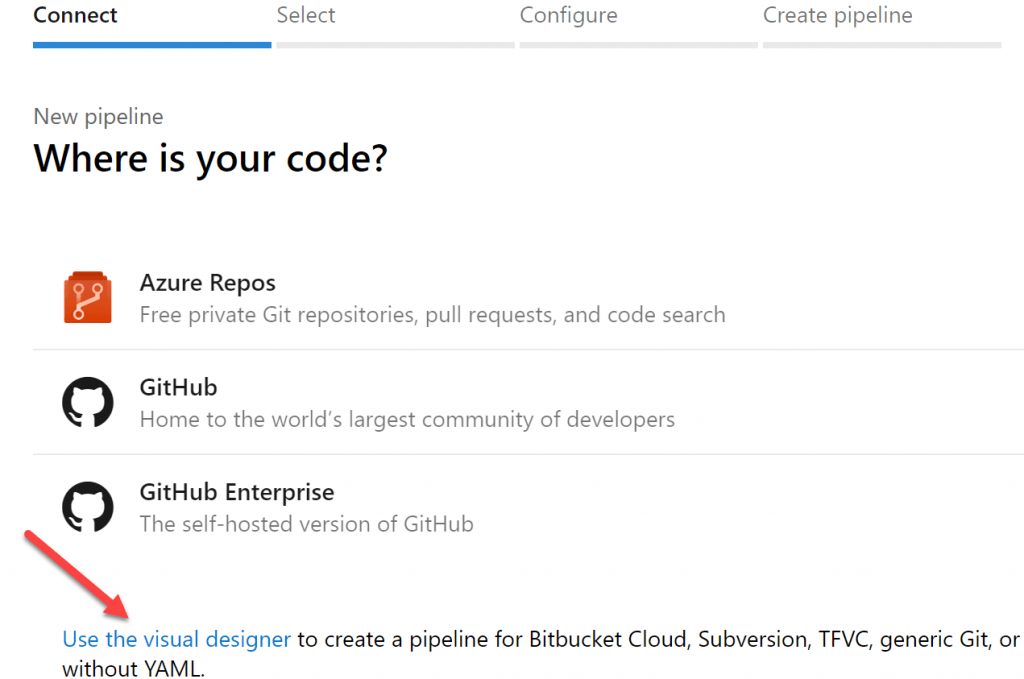
The wizard will ask where my code is. For this example, I clicked ‘Use the visual designer’ link at the bottom.
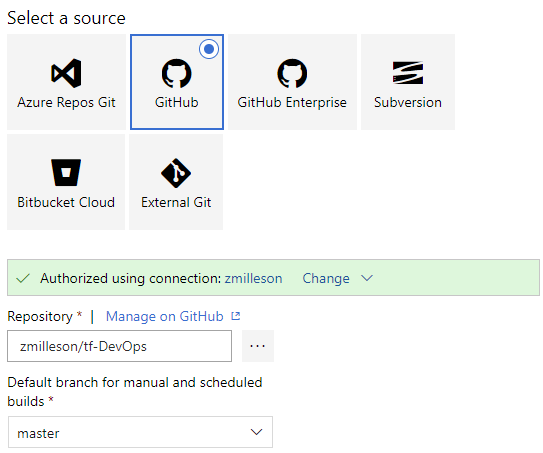
Now I can select the repo where my Terraform code resides. If you are pulling the code from an external repo source, you will need to authorize the connection. In this example, I have already done that as shown by the green banner message. My repo can be found here. Click ‘Continue’ to proceed.
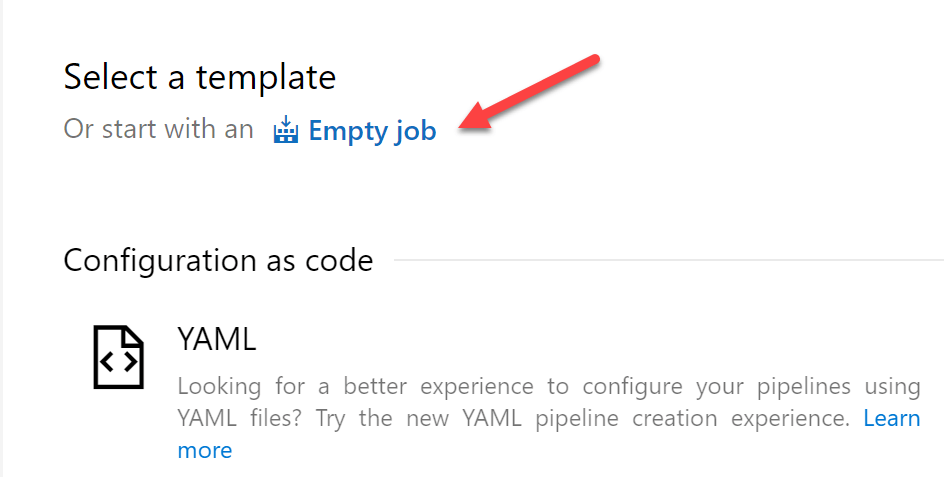
The next step is to select a template. The examples available do not align with my pipeline goals, therefore, I will click ‘Empty job’ at the top.
After that, I am presented with a empty pipeline awaiting to add tasks.
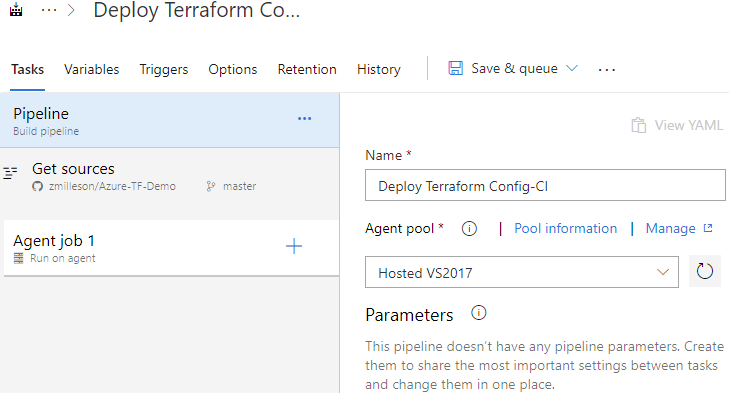
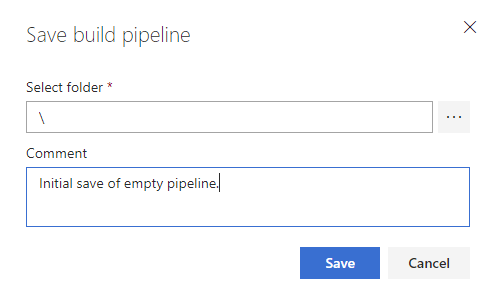
Before adding in tasks, click the down arrow next to ‘Save & queue’ and then select ‘Save’. This ensures the new pipeline is saved.
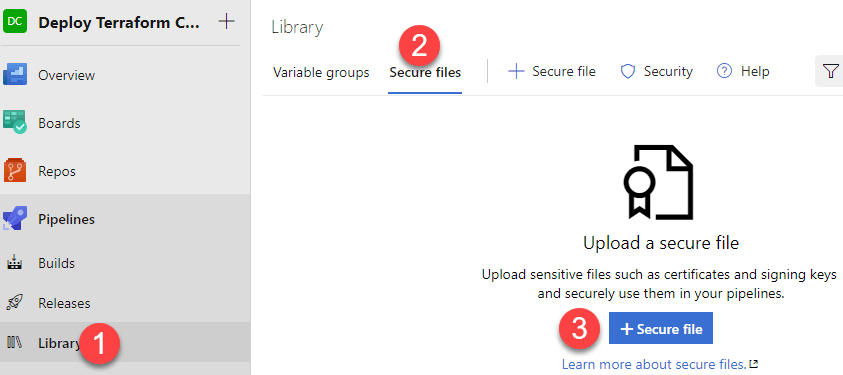
Add Secure Files
Next, I will add any secret files into my Pipeline Library. In the menu to the left, click ‘Library’. After that, click ‘Secure files’ at the top and then click the ‘+ Secure file’ button as shown.
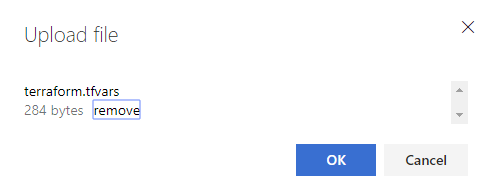
It prompts me to upload my secure file. I will choose my ‘terraform.tfvars’ file that includes my secret Azure provider connection information. Later this secure file will be imported into a task in the build pipeline.
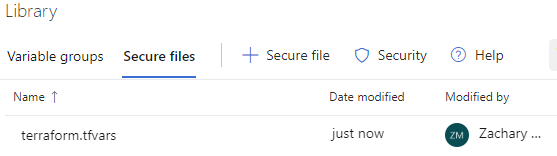
After the secure file has been uploaded, it will show up in the list of available secure files.
Add Build Variables
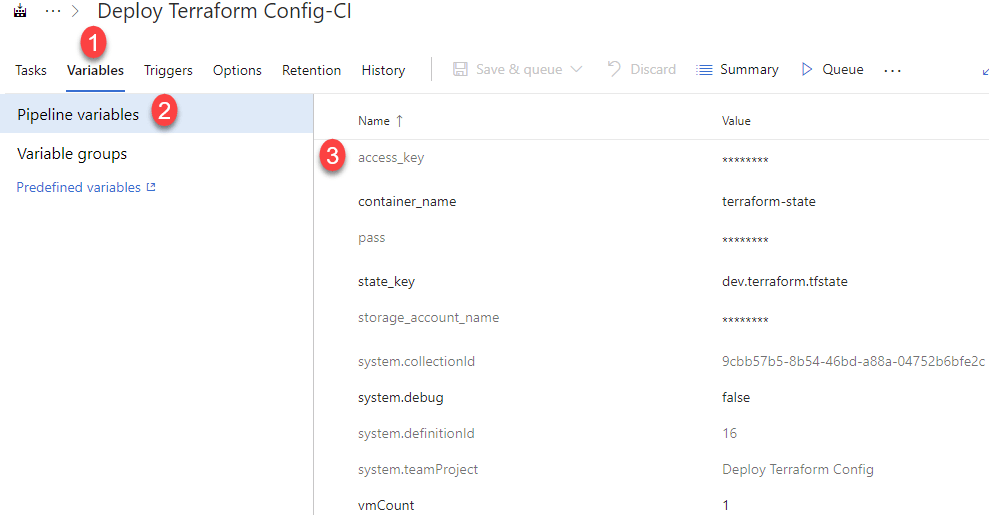
Build variables will also be used throughout a few of the tasks during the build. Go back to ‘Builds’ in the menu and go back to the pipeline we began previously. Click ‘Edit’ in the top right to pick up where we left off. Then select ‘Variables’ and then ‘Pipeline Variables’.

In the center pane, I created the following variables:
- access_key(secured) – The key used to access the storage account blob
- container_name – The name of the container in my blob store.
- pass(secured) – The password used for the guest OS in the deployed VM.
- state_key – The name of the state file stored in the blob container.
- storage_account_name(secured) – The name of the storage account where the Terraform state will be stored.
- vmCount – How many VMs that should be deployed by Terraform.
Create Build Tasks
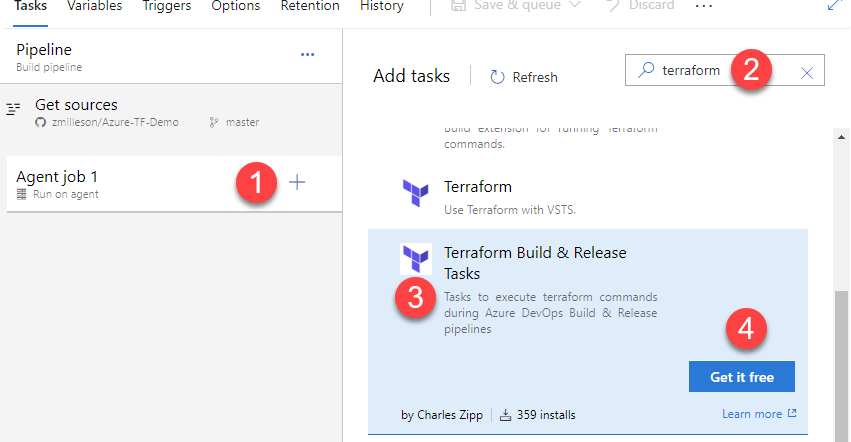
After my secure file is uploaded and variables created, I need to return to my build pipeline tasks. Then click the ‘+’ to the right of the default ‘Agent job 1’. The plus sign displays the list of available tasks that can be added. By default, the Terraform tasks I need to add are not available out of the box. Therefore, in the search box type ‘Terraform’. It searched the Marketplace and found a few available Terraform extensions. The extension I want has the name ‘Terraform Build & Release Tasks’ and is written by Charles Zipp. Click “Get it free’ to add it to the available tasks.
Once the extension is installed, the available tasks are shown above the marketplace items.
Add Terraform Tasks
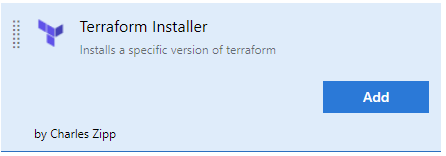
The first task will be installing Terraform on the agent server. Select the ‘Terraform Installer’ tasks and click Add.
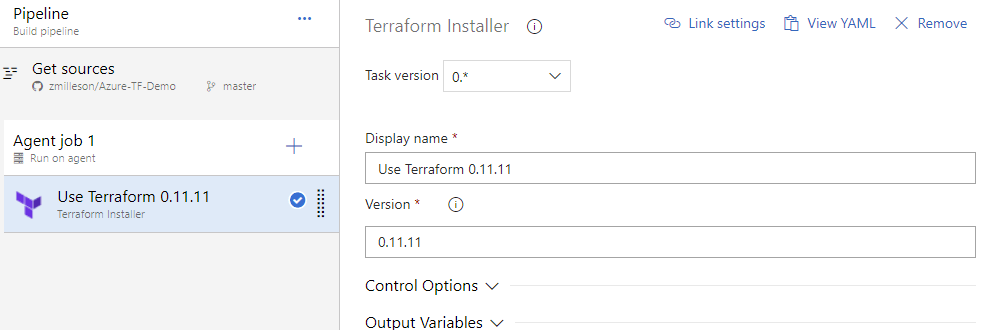
After the Terraform Installer has been added as a task, click it to display the configuration on the left. By default, it will install version 0.11.11, which at the time of this post, is the latest version. There is no more configuration needed for this task.
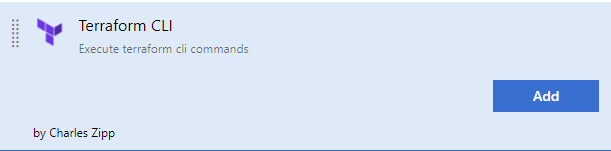
The next task will use the ‘Terraform CLI’ task. Search for it and click Add. I will use this task multiple times subsequently, therefore, I clicked Add THREE more times.
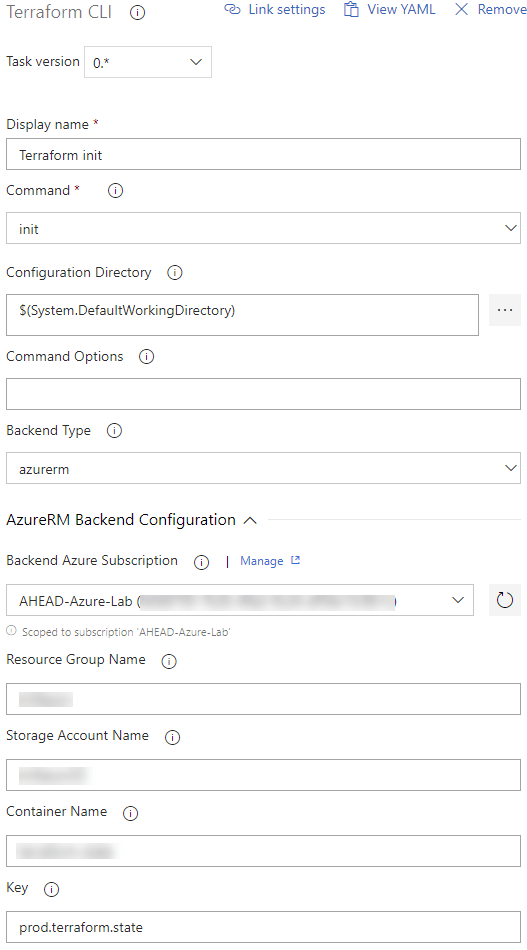
Each of the Terraform CLI tasks that were added will need to be modified for the specific operations run in order. As a result, ‘terraform init’ will need to run first. The init CLI command within the extension has configuration to setup the backend for state storage on an Azure blob. Make sure the service account that is created for DevOps to communicate with the Azure subscription has proper access to the blob storage.
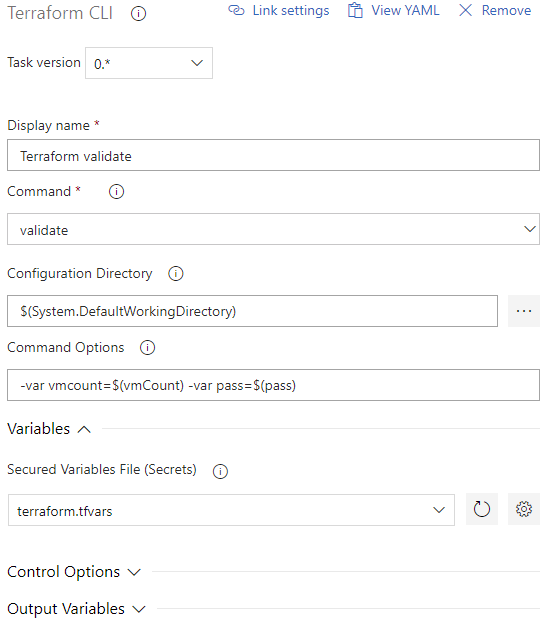
My next task is to run ‘terraform validate’ against my terraform code. When the validate command is chosen from the CLI task, the task configuration options change. My terraform code requires two variables to be passed, vmcount and pass. Therefore, I need to add those variables into the command options. I am passing the variables from the build’s variables I previously set up. The secure variables file I uploaded is also selected under the ‘Variables’ section.
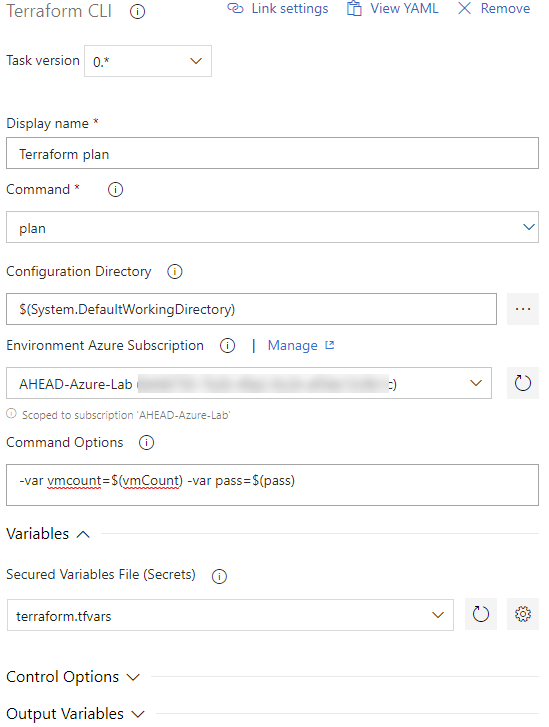
The next task is of course ‘terraform plan’. The settings are almost the same as validate. The only difference is the selection of the Azure subscription to deploy to.
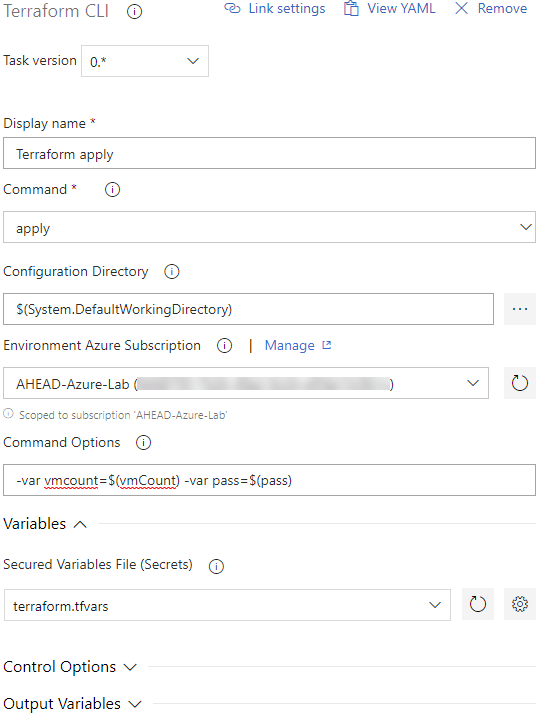
Finally, ‘terraform apply’ needs to be run. As expected, the configuration is identical to the plan command.
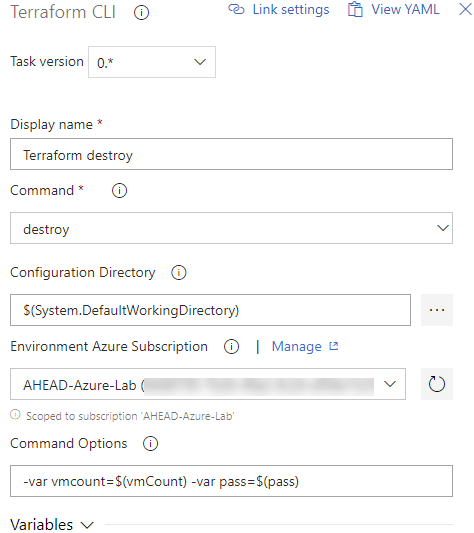
Because this was primarily for testing, I chose to use the destroy command to ensure cleanup of my public cloud resources to prevent a large bill. The destroy configuration looks similar to the above tasks.
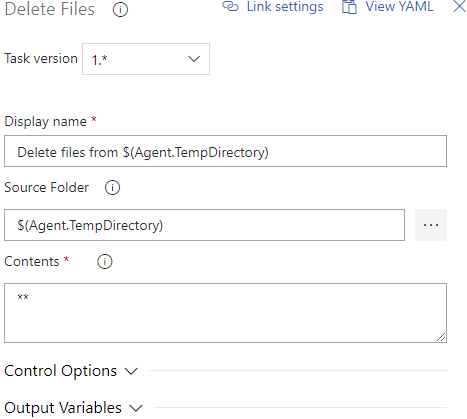
Finally, I want to make sure my tfvars file that was copied to the agent server is removed. The ‘Delete Files’ task is made for this. The $(Agent.TempDirectory) source folder needs to be entered along with the contents of ‘**’ (double asterisk).
After all of these tasks are set up, manually initiate a queue of this build process and watch it deploy your desired infrastructure. It should look like the following screenshot.
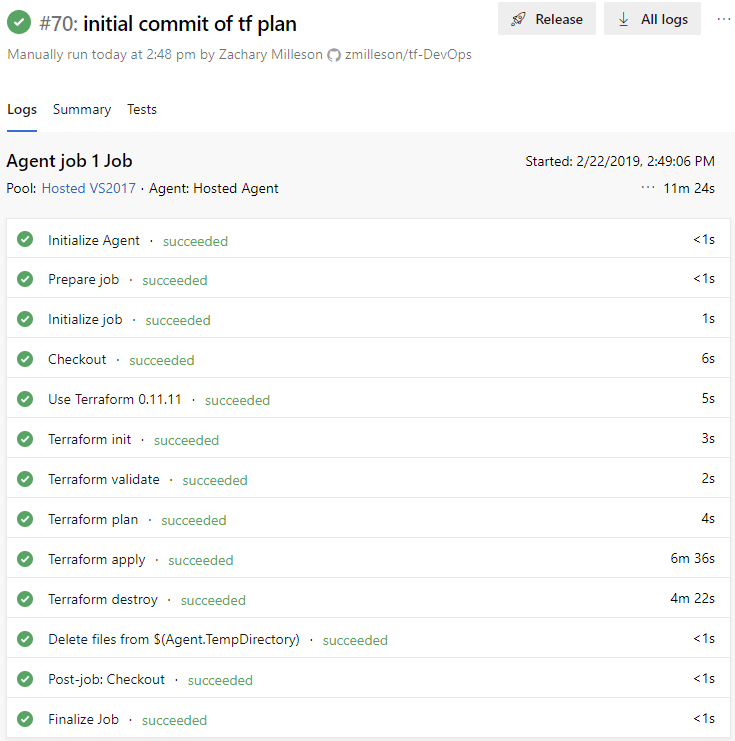
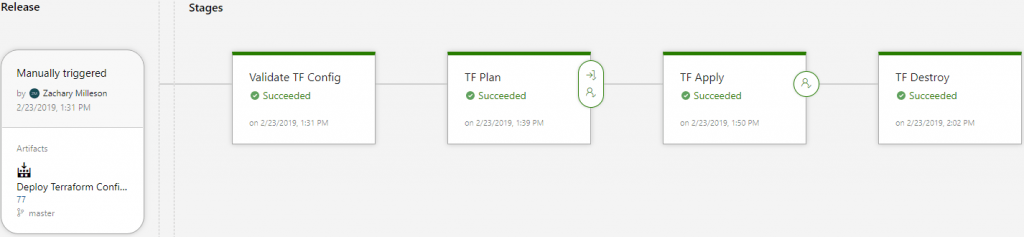
The screenshot above shows a successful build of that confirms our Terraform configuration is able to be deployed. After this, the build artifacts should collected and stored either in Azure Artifacts or on an accessible file share. A release pipeline will be made that will consume the artifacts to create a release. An example a release could look like this.
Summary
Once your Terraform configurations are consumed by multiple people within your organization, you should begin using version control to ensure validated configurations are being used. You can use Azure Pipelines to create a continuous integration process to build and test commits to the code repository. In addition, a full CI/CD process can be implemented when releases are added in.
As I mentioned earlier, the methods I chose to use in the build pipeline is not the only way to achieve this result. However, to get up and going, this may be the quickest method.
You could deploy Terraform configuration via Azure Pipelines as a bridge between the stage of Terraform opensource and Terraform Enterprise. Terraform Enterprise has much of this functionality built in along with other Terraform specific features that are very useful when scale has grown.
3 Comments
Leave a reply →