Get-VM

Automating the World Around Me

June 30, 2020
by zach
0 comments

Cut 4

AzureAzure

Microsoft Build Session – Microsoft Build was 100% virtual for 2020. All of the sessions can be found on its site for free. Lots of great content to binge watch. A future post listing the sessions I found most useful to me is coming.

Intro to Azure Blueprints – This is a good thorough intro to the Blueprints service. This service can be very useful if you need to create environments or even subscriptions in a repeatable way. It is still technically in preview but has been around for over a year and many are using them.

Azure Conditional Access Policies – This is a good primer for those looking into securing their Azure environment. Check it out to reinforce what you may have already done or should be doing in your own environment.

Event Hub Introduction – A YouTube video by Adam Marczak that teaches what Event Hubs are and how they are used.

Event Grid Introduction – Another YouTube intro video by Adam Marczak. This time for Event Grids.

Serverless DB Computing with Cosmos DB and Functions – A quick YouTube video describing the binding that can be created with an Azure Function and Cosmos DB.

Azure Architecture Center – This is the official Azure Architecture site where you can numerous different architecture guides across the Azure ecosystem as well DevOps. Therefore, this is a must when designing an architecture for a new solution or framework.

Introducing App Service Static Web Apps – A new service that seems to blend an App Service features with a Storage Account’s static website capabilities. At this time, it seems to be deployed by GitHub Actions and not Azure DevOps. I would expect in the future AzDO will be capable to integrate with this service.

Azure DevOps

All about Azure Pipelines – There are a bunch of links to a series of how-to articles relating to Azure Pipelines written by Eric Anderson. Lots of YAML references to brush up on. The link points to his Reddit post because his last blog post is the only one that includes the other article links.

Infrastructure as Code with Terraform and AzDO – This is a getting started with Terraform and AzDO pipelines. Definitely a good kickstart for those doing it for the first time.

Terraform

Terraform Functions, Expressions and Loops – The layout and examples Terraformprovided for these various Terraform features is helpful. The official Terraform documentation describing these items can be a bit sparse on examples and info.

Extracting Terraform Outputs in Azure Pipelines – Running Terraform templates in Azure Pipelines can be a quick way to integrate IaC code into application deployments. However, after the infrastructure is deployed from the pipeline, you may want to know the resources that were created to reference later in the pipeline. This post does a good job of explaining how to do that.

Safe Terraform with AzDO – There are lots of basics for Terraform sprinkled in here but there are some very good talking points when attempting to adopt Azure Pipelines as your primary pipeline solutions with Terraform. This touches on safety of deploying and security of your secrets within Terraform.

April 19, 2020
by zach
0 comments

Cut 3

Terraform

How to use Terraform as a Team – A very good post on going beyond using Terraform as a single engineer and overcoming the challenges that are presented when using TF as a team.

Terraform 0.12 Examples – This quick post was featured in a HashiCorp newsletter. It has some really good examples showcasing the 0.12 update.

Azure DevOps

Building All The Things – The Home Assistant application describes how they use Azure DevOps to build and release their frequent updates to their application.

Reap What You Sow II – Ike first started with showing how to deploy Terraform templates with Azure Pipelines. This second part, he set up the pipeline again. However, this time he did it using a YAML definition. As I am all aboard the IaC train, I need to force myself to use YAML to define my Azure Builds and Pipelines too.

CI/CD for Azure Data Factory – I’ve been researching Azure Data Factory lately. This article describes how to set up a CI/CD process to set up and maintain your ETL/ELT processes.

DevOps in Azure with Databricks and Data Factory – A good post showing background of how Azure DevOps, Data Factory and Databricks can be integrated with each other. All while configuring it with IaC.

Using Parallel Jobs in Azure Pipelines – This is a good walkthrough on how to create parallel jobs in the YAML pipeline format. 

Multiple Jobs in YAML – A good walkthrough on how to use multiple jobs in YAML.

Study Guide for AZ-400 – As I am studying to take the AZ-400 exam, this plethora of documentation is coming in handy. 

May 13, 2019
by zach
0 comments

Cut 2

Welcome to another release of my cuts. It has been a while since the initial Cut but I finally got this out the door.

Azure DevOps

Predefined Build Variables for Azure DevOps – Official documentation regarding all of the build variables for Azure DevOps Builds.

Azure Pipeline VM Images for Microsoft-Hosted CI/CD – This useful repo contains great information about what is on the hosted VMs that are available for use on Azure Pipelines. It contains all of the installed packages and software available.

Azure Functions

Migrating Azure Functions from v1 to v2 – If you’re still running on v1 of Azure Functions, check this out to migrate to v2.

In Order Event Processing with Azure Functions – This article describes how to process numerous events in order while initiating a function. It waits for the function to complete before the next event is sent and run through the function.

Choosing between Queues and Event Hubs – A good article describing when to use Queues or Event Hubs to process messages in functions.

Making Sense of Azure Durable Functions – Durable Functions is a new take on the traditional stateless functions. Durable Functions opens a new world of processing data with being stateful and much longer time-frames.

Run Azure Functions in a Docker Container – I stumbled on the ability to run an Azure Function from a docker container instead of the normal Azure App Service. This article shed some light on the questions I still had after going through Microsoft’s tutorial in their documentation.

Logic Apps

Custom Connectors in Azure Logic Apps – This post describes how you can create a custom connector in Logic Apps. The example is showing how to pull data from a fantasy sports site. I was surprised how easy this is.

Data Science

Python Data Visualization Libraries – Seven tools to create data visualizations with Python. I’ve worked with Python and some college football data in the past so this hits home. It is amazing how easy it is to take raw data and let Python do its visualization magic.

HashiCorp

HashiTimes – A couple co-workers of mine set up a new HashiCorp newsletter. I highly recommend checking this out if you are interested in any of the HashiCorp products.

Terraform on Azure Documentation – Within Azure’s own documentation, they have multiple examples of how Terraform can be used to deploy Azure resources.

Terraform Layout – This post goes through the life of a terraform project. It all starts off small and to the point but can get out of control, like a teenager, after some time. It provides a recommendation of how a terraform layout of modules can be created to support multiple environments without getting too large to handle.

A Guide to Automating HashiCorp Vault – A series of blog posts describing how to auto-unseal and authentication methods within AWS/GCP.

Terraform: The definitive guide for Azure Enthusiasts – I have been studying a lot of Terraform and Azure recently. This reference guide is a great resource to have for beginners using Terraform to automate and manage their Azure environment.

Miscellaneous

Regex Cheat Sheet – Regex is like black magic. Occasionally, I need to tap into that black magic for some validation testing. I came across this page of easy to understand Regex snippets.

GitHub Package Repository – A new service that is currently under preview. I’m excited to receive the invite to check it out. This may be a big service for companies that need to share packages within their org securely.

February 26, 2019
by zach
3 Comments

Deploy Terraform Configuration via Azure Pipelines

I wanted to see if I could deploy infrastructure with Terraform via Azure Pipelines. To my surprise, there are Terraform extensions in the Azure Pipelines marketplace. These plugins allow me to get up to speed and achieve my goal quickly. This guide is not the only way to perform this integration but will allow you to get started. Therefore, I suggest modifying the steps and process to fit your needs.

Create a Project

First, you will need to create a new project within Azure DevOps. After logging into your DevOps organization, click Create Project to the right.

Create a new project within your DevOps organization

You will be presented with a quick project configuration box to complete. I named my project ‘Deploy Terraform Config’ as shown in the example.

Create a new project

Subsequently, your new project will show up and ask what services that you want to start with. This demo will use the Pipelines service. In addition, you may also use the Repos service if you didn’t already have your Terraform in an external repo.

Project created

Create a Build in Azure Pipelines

Next, I will create a new build pipeline. In the left menu, click Pipelines and then Builds. It will say there were no build pipelines found. Click ‘New Pipeline’ to proceed.

Create a build pipeline

The wizard will ask where my code is. For this example, I clicked ‘Use the visual designer’ link at the bottom.

Use the visual designer

Now I can select the repo where my Terraform code resides. If you are pulling the code from an external repo source, you will need to authorize the connection. In this example, I have already done that as shown by the green banner message. My repo can be found here. Click ‘Continue’ to proceed.

Select your code repo

The next step is to select a template. The examples available do not align with my pipeline goals, therefore, I will click ‘Empty job’ at the top.

Select Empty Job

After that, I am presented with a empty pipeline awaiting to add tasks.

Empty Build Pipeline ready for tasks

Before adding in tasks, click the down arrow next to ‘Save & queue’ and then select ‘Save’. This ensures the new pipeline is saved.

Saving a build pipeline

Add Secure Files

Next, I will add any secret files into my Pipeline Library. In the menu to the left, click ‘Library’. After that, click ‘Secure files’ at the top and then click the ‘+ Secure file’ button as shown.

Upload a secure file

It prompts me to upload my secure file. I will choose my ‘terraform.tfvars’ file that includes my secret Azure provider connection information. Later this secure file will be imported into a task in the build pipeline.

Upload terraform.tfvars

After the secure file has been uploaded, it will show up in the list of available secure files.

Add a secret file

Add Build Variables

Build variables will also be used throughout a few of the tasks during the build. Go back to ‘Builds’ in the menu and go back to the pipeline we began previously. Click ‘Edit’ in the top right to pick up where we left off. Then select ‘Variables’ and then ‘Pipeline Variables’.

Edit the build pipeline

In the center pane, I created the following variables:

  • access_key(secured) – The key used to access the storage account blob
  • container_name – The name of the container in my blob store.
  • pass(secured) – The password used for the guest OS in the deployed VM.
  • state_key – The name of the state file stored in the blob container.
  • storage_account_name(secured) – The name of the storage account where the Terraform state will be stored.
  • vmCount – How many VMs that should be deployed by Terraform.
Pipeline variables

Create Build Tasks

After my secure file is uploaded and variables created, I need to return to my build pipeline tasks. Then click the ‘+’ to the right of the default ‘Agent job 1’. The plus sign displays the list of available tasks that can be added. By default, the Terraform tasks I need to add are not available out of the box. Therefore, in the search box type ‘Terraform’. It searched the Marketplace and found a few available Terraform extensions. The extension I want has the name ‘Terraform Build & Release Tasks’ and is written by Charles Zipp. Click “Get it free’ to add it to the available tasks.

Get Terraform Build & Release Tasks extension

Once the extension is installed, the available tasks are shown above the marketplace items.

Add Terraform Tasks

The first task will be installing Terraform on the agent server. Select the ‘Terraform Installer’ tasks and click Add.

Add Terraform installer

After the Terraform Installer has been added as a task, click it to display the configuration on the left. By default, it will install version 0.11.11, which at the time of this post, is the latest version. There is no more configuration needed for this task.

Install Terraform

The next task will use the ‘Terraform CLI’ task. Search for it and click Add. I will use this task multiple times subsequently, therefore, I clicked Add THREE more times.

Add Terraform CLI tasks

Each of the Terraform CLI tasks that were added will need to be modified for the specific operations run in order. As a result, ‘terraform init’ will need to run first. The init CLI command within the extension has configuration to setup the backend for state storage on an Azure blob. Make sure the service account that is created for DevOps to communicate with the Azure subscription has proper access to the blob storage.

Terraform Init Configuation

My next task is to run ‘terraform validate’ against my terraform code. When the validate command is chosen from the CLI task, the task configuration options change. My terraform code requires two variables to be passed, vmcount and pass. Therefore, I need to add those variables into the command options. I am passing the variables from the build’s variables I previously set up. The secure variables file I uploaded is also selected under the ‘Variables’ section.

Terraform Validate

The next task is of course ‘terraform plan’. The settings are almost the same as validate. The only difference is the selection of the Azure subscription to deploy to.

Terraform Plan

Finally, ‘terraform apply’ needs to be run. As expected, the configuration is identical to the plan command.

Terraform Apply

Because this was primarily for testing, I chose to use the destroy command to ensure cleanup of my public cloud resources to prevent a large bill. The destroy configuration looks similar to the above tasks.

Terraform destroy

Finally, I want to make sure my tfvars file that was copied to the agent server is removed. The ‘Delete Files’ task is made for this. The $(Agent.TempDirectory) source folder needs to be entered along with the contents of ‘**’ (double asterisk).

Delete sensitive files from the agent server.

After all of these tasks are set up, manually initiate a queue of this build process and watch it deploy your desired infrastructure. It should look like the following screenshot.

A successful pipeline build

The screenshot above shows a successful build of that confirms our Terraform configuration is able to be deployed. After this, the build artifacts should collected and stored either in Azure Artifacts or on an accessible file share. A release pipeline will be made that will consume the artifacts to create a release. An example a release could look like this.

Successful Release

Summary

Once your Terraform configurations are consumed by multiple people within your organization, you should begin using version control to ensure validated configurations are being used. You can use Azure Pipelines to create a continuous integration process to build and test commits to the code repository. In addition, a full CI/CD process can be implemented when releases are added in.

As I mentioned earlier, the methods I chose to use in the build pipeline is not the only way to achieve this result. However, to get up and going, this may be the quickest method.

You could deploy Terraform configuration via Azure Pipelines as a bridge between the stage of Terraform opensource and Terraform Enterprise. Terraform Enterprise has much of this functionality built in along with other Terraform specific features that are very useful when scale has grown.

February 19, 2019
by zach
0 comments

Initial Cut

This is my first attempt at a new type of blog entry. My “cut” posts will be quick references of items that I have come across that I feel have made my cut recently as being important enough to save for later. You may have seen something like this in on other blogs. I have tried multiple methods or products to store important links and info for later reference without much success. These links made my initial cut.

The cut series will be published as needed. The next cut could be a week after the previous, or even a month later. It depends on how much content I discover in a period of time that would warrant a full cut. Now on to the initial cut!

Azure Cut

Azure

DevOps Cut

DevOps

  • Azure DevOps Demos – There is an Azure DevOps demo generator that will connect to your DevOps organization and create a full example project to show the functionalities of Azure DevOps. There are multiple examples to choose from depending on what you’re looking for. I highly recommend this if you are getting started with Azure DevOps.
  • DTAP is Dead – Traditionally, I have been in operations and infrastructure in general. I am getting more into working with the development side. This article has a lot of great information for me as I am researching development methodologies.

Internet of Things

  • IoT In Action Virtual Bootcamp – Microsoft hosted a free virtual bootcamp to get started with IoT devices and IoT services in Azure. This was a great intro that exposes you to multiple ways to configure and interact with IoT devices.
Terraform Cut

HashiCorp

  • Creating a Terraform Provider for Just About Anything – I have come across some missing functionality within Terraform providers. I plan to start by making pull requests to add functionality. There are also a few integrations I have thought about that don’t have providers available. This video is a good intro for that.
  • Microsoft Publishes Video Series on HashiCorp – If you’re interested in using Terraform or Vault with Azure, check out these videos. Microsoft and HashiCorp have a great partnership. The consumers of these technologies benefit from this collaborative effort!
  • Why Should I Consider Terraform Enterprise – This is a great video from Armon Dadgar why and when Terraform Enterprise makes sense over the free open source Terraform.
  • Azure Provider Upgrade Guide – The official upgrade guide to the 2.0 Azure provider release.

Miscellaneous

  • Developing vRealize Content with Visual Studio Code – I will always enjoy working with vRealize Orchestrator. VS Code is my favorite IDE currently. Merging the two peaked my interest! However, it is not available to the public. That is a SHAME!
  • The Life of a GitHub Action – GitHub Actions are still in beta. I haven’t been contacted to try out the service unfortunately. However, Jessie Frazelle gives the rest of us a sneak peak into the new service.

December 20, 2018
by zach
0 comments

Sentinel Policy Framework for Terraform Enterprise

Recently, I have put a lot of time into HashiCorp’s Terraform product. It interests me because of its capability to Terraformautomatically provision resources across numerous platforms such as vSphere, Azure, AWS, etc. As I branch out my expertise from on-premises infrastructure to public cloud infrastructure, I need a tool to automate new deployments. Terraform checks the boxes to help me achieve these goals. As I dove deeper into Terraform and its enterprise variant, I discovered Sentinel which is a policy framework that HashiCorp built to provide governance across their enterprise products.

The Need for Policy

Many of us in IT enjoy our full admin access in our environments. However, when we provide a self-service method to our users to begin deploying their own resources, we need policies to keep our users in check. This is especially true when we grant our users access to the public cloud where resources incur hourly or monthly charges. As a result, provisioning resources in the public cloud without guardrails will quickly get out of hand and can rack up a hefty bill. Therefore, it requires some level of governance to exist. 

Real-World Use Cases

Sentinel is embedded in many of HashiCorp’s enterprise products. This article will focus on the Terraform Enterprise product. Sentinel is included in the Premium tier of Terraform Enterprise. When Sentinel is used within Terraform Enterprise, it grants a way to limit resource deployment from our Terraform code. Every company has policies in place to ensure standard practices and enforcing limitations on its users, developers, and even the infrastructure team itself. A few examples of the most common governance put into place are:

  • Prevent large or unwanted VM/instance sizes
  • Standardize on VM/instance images
  • Validate the required tags are assigned to resources
  • Verify required security is applied to resources
  • Deployment of resources into specific regions

Enter Sentinel

Terraform Enterprise can deploy many types of resources across numerous infrastructure providers. In the wrong hands, these deployments can present many problems beyond just a large bill at the end of the month. When Sentinel policies are enforced within Terraform Enterprise, the IT staff can ensure infrastructure provisioning can be tightly controlled. Sentinel policies are small pieces of code written in Hashicorp’s Sentinel policy language. Let’s take a look at how a Sentinel policy is built. 

First, log in to your Terraform Enterprise environment. Click Settings in the menu at the top. On the left menu, click Policies. Finally, click Create a New Policy.

Create a new Sentinel Policy

The next screen contains a few items for entry. First, enter a policy name. The next field is the enforcement mode which tells Sentinel how strict it needs to be when enforcing this policy. There are currently three modes to select from:

  • Hard-Mandatory – The policy cannot be overridden if the plan is non-compliant.
  • Soft-Mandatory – An organization owner may override the policy if the plan is non-compliant.
  • Advisory – This is for logging a compliant and non-compliant plan. If the plan is non-compliant, it will continue after it is logged.

More information about the enforcement modes can be found within HashiCorp’s official documentation.

Sentinel Policy Enforcement Mode

For this example, I’ll leave the enforcement mode to hard-mandatory.

The last section is where we will enter the policy code. This policy will focus on restricting VM sizes for deployments in Azure. Thankfully, HashiCorp has put a lot of effort into providing examples on GitHub for the public to quickly consume. Within HashiCorp’s “terraform-guides” repo, there is a governance folder where multiple policy examples reside. I will take the “restrict-vm-size.sentinel” code and update the VM sizes for my needs. The code I am using for the policy is shown below:

import "tfplan"

get_vms = func() {
    vms = []
    for tfplan.module_paths as path {
        vms += values(tfplan.module(path).resources.azurerm_virtual_machine) else []
    }
    return vms
}

# comparison is case-sensitive
# so including both cases for "v"
# since we have seen both used
allowed_vm_sizes = [
  "Standard_B1S",
  "Standard_B1MS",
  "Standard_B2S",
  "Standard_B2MS",
  "Standard_D1_v2",
  "Standard_D1_V2",
  "Standard_D2_v3",
  "Standard_D2_V3",
  "Standard_DS1_v2",
  "Standard_DS1_V2",
  "Standard_DS2_v2",
  "Standard_DS2_V2",
  "Standard_A1_V2",
  "Standard_A1_v2",
  "Standard_A2_V2",
  "Standard_A2_v2",
  "Standard_D1_V2",
  "Standard_D1_v2",
  "Standard_D2_V2",
  "Standard_D2_V2",
]

vms = get_vms()
vm_size_allowed = rule {
    all vms as _, instances {
      all instances as index, r {
  	   r.applied.vm_size in allowed_vm_sizes
      }
    }
}

main = rule {
  (vm_size_allowed) else true
}

Diving Into The Code

Furthermore, let’s take a look at the code and learn what it is doing, piece by piece. First, it imports a Terraform plugin.

import "tfplan"

The policy is importing the Terraform plan plugin that contains a library, data, and functions that are used when analyzing a Terraform plan. Similarly, there are two additional Terraform plugins that can also be imported. These include “tfconfig” and “tfstate” which contain information to analyze the Terraform config files and state, respectively. To analyzeyour code appropriately, import the necessary plugins at the beginning of each policy. More information about the importable plugins for Terraform is found here.

The next section is a function that scans the Terraform plan and returns all of the Azure Virtual Machine types into an array.

get_vms = func() {
    vms = []
    for tfplan.module_paths as path {
        vms += values(tfplan.module(path).resources.azurerm_virtual_machine) else []
    }
    return vms
}

The next section creates a new array named “allowed_vm_sizes” and assigns the VM sizes I want to limit to when deploying to Azure. As shown below, the original author of the code commented that VM sizes had been seen with both capital and lowercase ‘V’ in the name. Therefore, you’ll notice that there are duplicate VM sizes with capital and lowercase ‘V’.

# comparison is case-sensitive
# so including both cases for "v"
# since we have seen both used
allowed_vm_sizes = [
  "Standard_B1S",
  "Standard_B1MS",
  "Standard_B2S",
  "Standard_B2MS",
  "Standard_D1_v2",
  "Standard_D1_V2",
  "Standard_D2_v3",
  "Standard_D2_V3",
  "Standard_DS1_v2",
  "Standard_DS1_V2",
  "Standard_DS2_v2",
  "Standard_DS2_V2",
  "Standard_A1_V2",
  "Standard_A1_v2",
  "Standard_A2_V2",
  "Standard_A2_v2",
  "Standard_D1_V2",
  "Standard_D1_v2",
  "Standard_D2_V2",
  "Standard_D2_V2",
]

The next section compares each of the {vm}.vm_size value in the “vms” array to the VM sizes in the “allowed_vm_sizes” array. It returns a boolean value to the variable “vm_size_allowed” after the comparison completes.

vms = get_vms()
vm_size_allowed = rule {
    all vms as _, instances {
      all instances as index, r {
  	   r.applied.vm_size in allowed_vm_sizes
      }
    }
}

The last section checks the “vm_size_allowed” value to see if it is true and returns to “main” to complete the check.

main = rule {
  (vm_size_allowed) else true
}

After a policy has been created, its rules are enforced across all workspaces in the Terraform Enterprise environment. Since these policies can be very restrictive, it is best to first set them to an advisory level and monitor the logs to ensure they are performing as expected. Once you’re satisfied with the results of the policy, increase the enforcement level.

Let’s See It In Action

I already have a plan in my Terraform Enterprise environment that I can test against. To test, I made a change to the vm_size in my code repo which will make the plan non-compliant for the new policy.

Changed Code

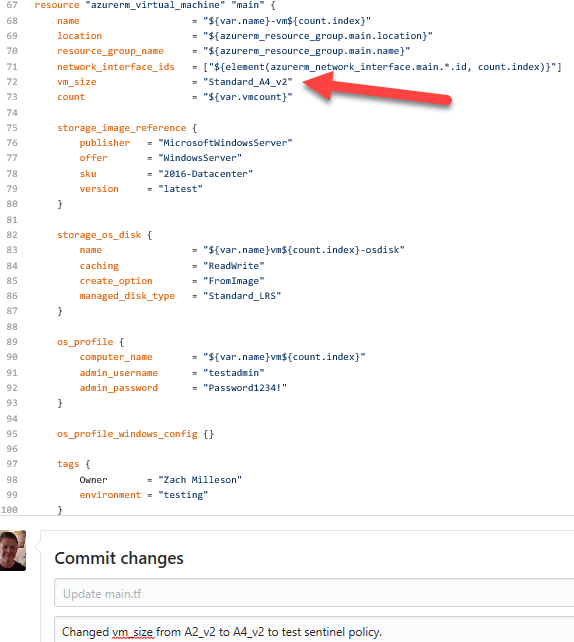
Once I commit the change, the webhook will automatically update my plan with the change and will attempt to queue a new plan.

Auto PlanLet’s take a look at the plan that was initiated and its summary.

Plan Success
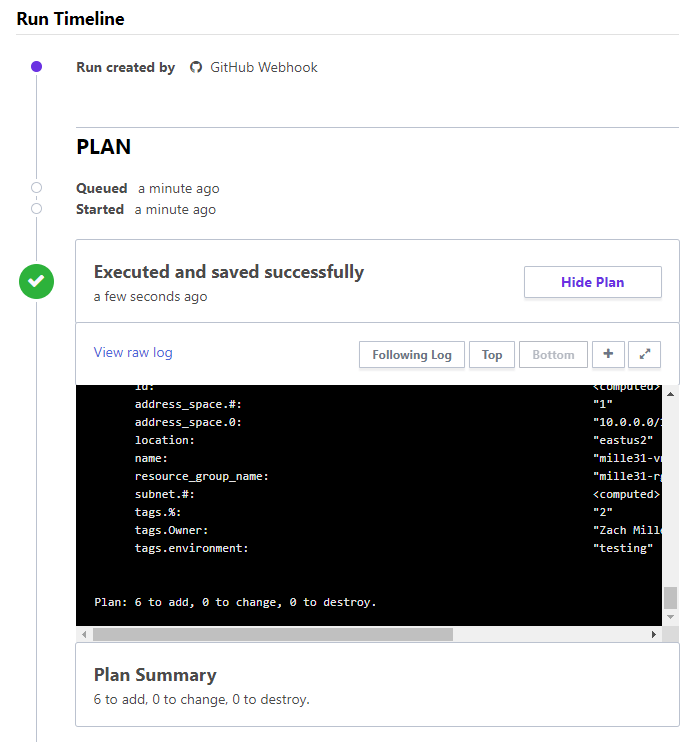
So far, so good. The plan was initiated and successfully ran! Now we can scroll down a bit and see the policy check.

Sentinel Policy EnforcedFinally, we see the policy enforcing its policy and prevents a Terraform apply from occurring as the plan was non-compliant with the new Sentinel policy.

Extra Resources

Certainly, there are numerous policies that can be built and tailored for your environment. Below is a list of resources that will be helpful to discover more about Sentinel.


October 19, 2018
by zach
0 comments

vRealize Automation Deployment Failed

I recently deployed a new vRealize Automation 7.5 environment. The deployment went without any issues. The configuration also went well. A week later, the console of the vRA appliance was launched and an error was displayed. The error indicates that the vRealize Automation deployment failed.

ERROR: DEPLOYMENT FAILED, YOU WILL NEED TO REDEPLOY

This was an odd error to see as the environment was up and running for well over a week with no indication anything was wrong. I searched the web and found one reference to it on the VMTN communities forum. A VMware employee had responded. They said to reboot the virtual appliance and ensure the services all registered after the reboot. If all was well, then to edit a welcome text file to remove the error. The error in the boot.msg file was Failed services in runlevel 3: network vcac-server. Slightly different than the service in the VMTN post.

I rebooted the appliance and confirmed the services registered correctly.

The welcome text file to edit is located at: opt/vmware/etc/isv/welcometext
Replace the error content with the following: ${app.name} - ${app.version}

The VMware employee indicates that a knowledge base article is being created for this issue. I will edit this post with an update to the KB when available.

October 5, 2018
by zach
0 comments

My Ignite Experience and Highlights

I was fortunate enough to attend Microsoft’s Ignite conference in Orlando last week. Normally, I attend VMworld as I have been to that conference six times. Earlier this year, I requested to attend Ignite in priority over VMworld because of my shifting focus. Luckily, I was given the go ahead to book for Ignite a couple weeks before it was sold out. I have only been to one Microsoft conference, which was a TechEd over five years ago. I’ll describe my Ignite experience and highlights.

Azure and Automation Sessions

Most of the sessions I added to my schedule were focused on automation, serverless, and Hashicorp’s Terraform integration with Azure. Early on, many of the sessions I had scheduled were on the expo floor. This was a new concept to me as these presentations were sprinkled across the expo floor but weren’t necessarily presentations by vendors. These expo theater sessions were 20 minutes where the breakout sessions in their own rooms were 75 minutes in length.

On Monday, I attended a session (BRK2213) led by Donovan Brown called “Getting Started with Azure DevOps”. I have seen Donovan on Channel 9 in the past and liked him in those videos. His session did not disappoint. He provided a good overview of Azure DevOps, previously Visual Studio Team Services, and then dove deeper. He talked about how many Microsoft teams uses Azure DevOps to build and maintain their respective products, including the Windows team. I wanted to go back and review this session video. Unfortunately, it may not become available as it included a few items that weren’t to be made public. I’ve reached out to determine if the video would be released at a later date or not.

Session BRK3266, Automation Tools for Azure Infrastructure, described a wide range of products that could be used to automate Azure. Powershell, Azure CLI, Azure Building Blocks, Terraform, and Ansible were discussed. All of the products have their strengths and weaknesses. Use cases surrounding these products were mentioned to give a better idea of when to use each. 

One of the first sessions that had a large focus on Terraform was BRK3194, “Deploying containerized and serverless apps using Terraform with Kubernetes (AKS) and Azure Functions. It was led by Christie Koehler (Hashicorp) and Zachary Deptawa (Azure). Zachary has been on a few Hashicorp webinars I have attended in the past. Between the two presenters, there is a lot of knowledge around Terraform and Hashicorp in general. This was jam packed with a lot of information and excellent demos. I will be rewatching this session to catch anything I missed as well as run through the same steps they showed in their demos to discover more about their session.

Kicking off Thursday morning was a deep session (BRK4020) about the Azure Functions internals. About half of the session was over my head as it got deep into the weeds of how Functions works but it was definitely worth attending or watching. Azure FunctionsThey showed many of the differences and advancements they have made from version 1.0 to 2.0. Azure Functions 2.0 is a big step in the right direction for all but before moving from 1.0 to 2.0, users need to check out if their function app will port directly over. Also, Functions on Linux with the consumption model is now in preview mode!

I ended the conference with a session (BRK3043) purely about Terraform in a multi-cloud environment led by Mark Gray. The session started off with the basics about Terraform but quickly gained steam and dove into some more advanced features. His demos were packed full of very good information and tips if you are learning Terraform. Mark also posted his demos to GitHub for anyone wanting to look closer at his code.

Other Interesting Ignite Sessions

On Tuesday morning, I attended session BRK2041 called “A deeper look at Azure Storage with a special focus on new capabilities”. This session had A LOT of content led by Tad Brockway and Jeffrey Snover. Multiple topics under the Azure Storage service was covered with many demos showing improvements within the service. There was also a history of their storage platform and its progress throughout the generations. A key fact of decreasing their storage costs by 98% through these generations was staggering.

Later on Tuesday, I attended another session (BRK3062) that goes into architecting security and governance across Azure subscriptions. Before this session, I had not been exposed too much to the security and governance side of things. It is a very important aspect of architecting an Azure solutions in my current position. The new Azure Blueprints feature was discussed briefly. Blueprints looks like it will be a very powerful tool for numerous use cases. This session has encouraged me to dive deeper into the subject. 

The biggest session on Thursday was Inside Azure Datacenter Architecture with Mark Russinovich (BRK3347). When I got in line twenty minutes before the session started, I was easily over 500 people back. Luckily the auditorium was very large and held everyone. This session is a must see if you are interested in the back end Azure infrastructure as well as its history. It was packed full of demos ranging across storage performance, service fabrics, and IoT sensor redundancy. It was my favorite session out of the entire conference. 

Interesting Announcements

Is it the year of VDI? Probably not, but Microsoft has a new service for Windows 7 and 10 desktops available. Virtual desktops are hard. If Microsoft can’t virtualize their own desktops effectively, who can? Pair up all of the services that Azure and Office 365 can easily tie in and this becomes a very attractive offering for companies. Check out more here.

As mentioned previously, Azure Blueprints will be a new focus for me going forward. The labs available to be taken during Ignite were locked down and deployed using Azure Blueprints. Knowing how to use the blueprints feature will be a differentiator for companies trying to ensure security and to control costs. More can be found here.

A friend of mine at a Fortune 500 company mentioned the new Azure ExpressRoute Global Reach announcement. This is interesting as he mentioned that this could be used to connect their datacenters over Microsoft’s backbone instead of paying for their current provider. Depending on the cost of everything, it may be a big cost savings. Keep an eye on the pricing as it may become very attractive for companies. Not much was posted about it but the announcement can be found here.

Overall Conference Experience

Overall, I enjoyed the Ignite conference and ranks at the top of conferences I have attended. The overall production value of Ignite felt like it was a step above VMworld. The video production in the community and expo areas as well as streaming of multiple sessions on the huge big board in the hang area was impressive. 
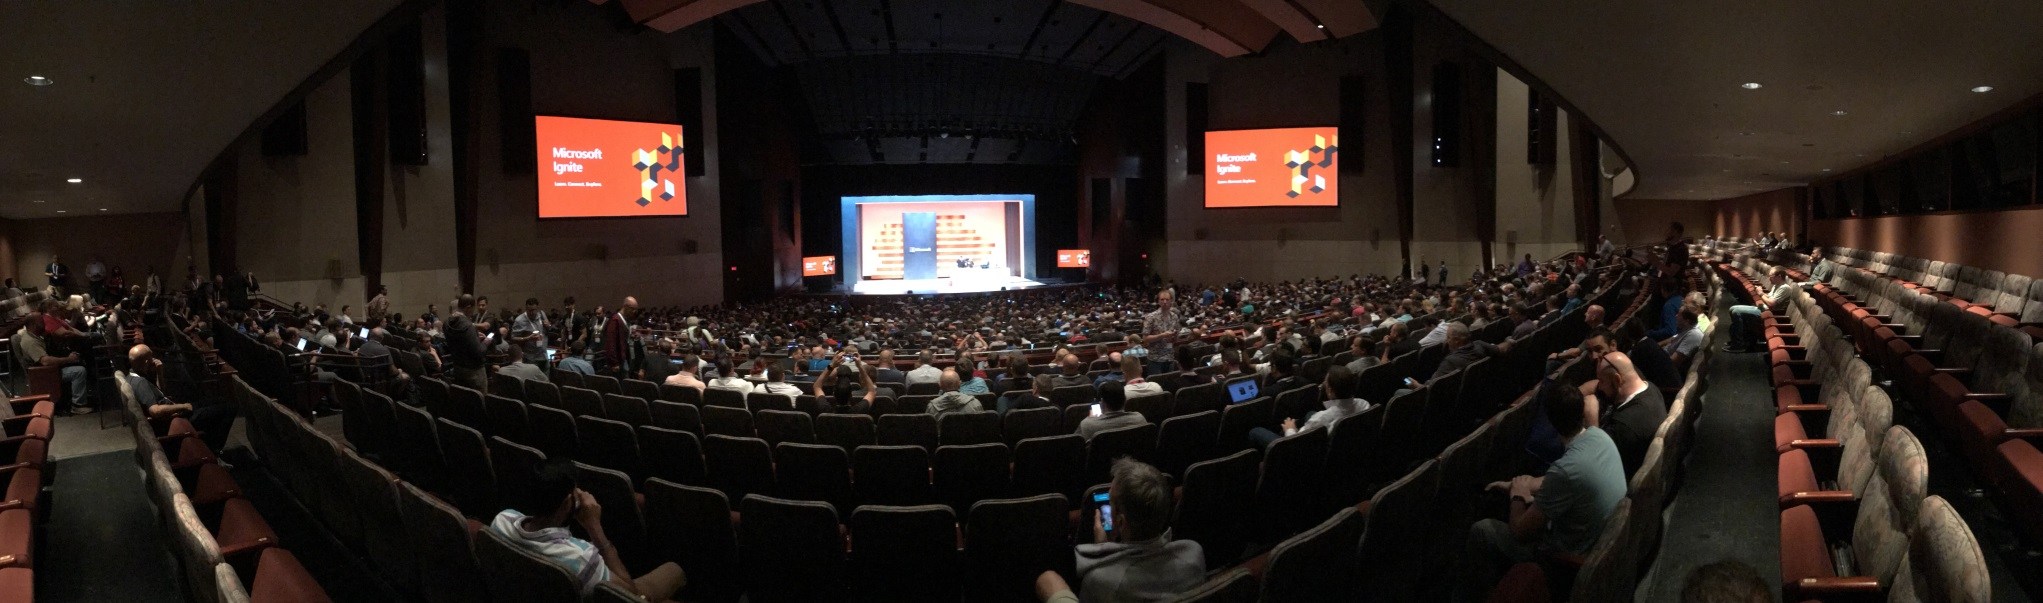
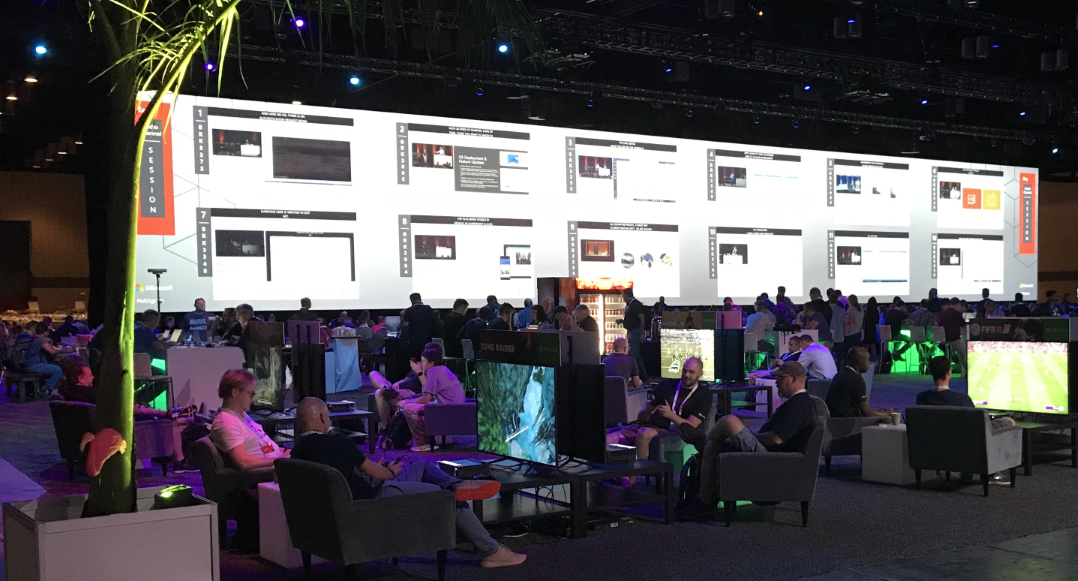
I watched two sessions from the hang area where I had originally planned to attend in person. One was because the session room was full. The other instance was of convenience when I was already watching another session and saw my next session was slated to be shown on the screen directly in front of me. The turnaround time of getting session videos online was impressive.

The demos and hands on experiences across the Microsoft technologies were great. I took the advantage of trying the HoloLens to discover its augmented reality benefits.

The transportation to the conference center from the hotels and back was well done. On Monday, the initial bus seemed to be late. The rest of the days had minimal wait times. My biggest gripe was on Thursday afternoon when the transportation window was cut down in preparation for the party. The busses were planning on leaving at 4:30 however, hundreds if not a thousand people were ready to head back at 4:10 and were waiting in line. The busses were waiting for us there at the curb but we were not allowed to enter the bus to escape the heat. Instead we all stood next to the busses waiting to get into the air conditioning. 

The food and refreshments weren’t bad. Breakfasts were the same every morning, which felt odd. A morning #BaconReport was provided by @Schumatt daily. Lunches and afternoon snacks did vary and weren’t too bad. Considering the amount of food that had to be made, none of us are expecting an amazing meal. I’ve definitely had worse in the past!

Next Year

I had a great time this year while learning a lot. I plan to return next year. The 2019 Ignite conference will return back to Orlando in 13 months on November 4th. 

April 19, 2018
by zach
0 comments

vRA 7.4 Upgrade Issue

VMware released the latest revision of vRealize Automation last week. I found some time to perform an upgrade to my homelab environment. At the time, 7.3.0 was the running version. vRA
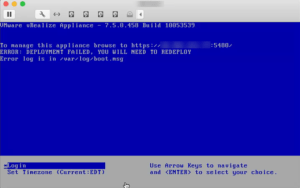
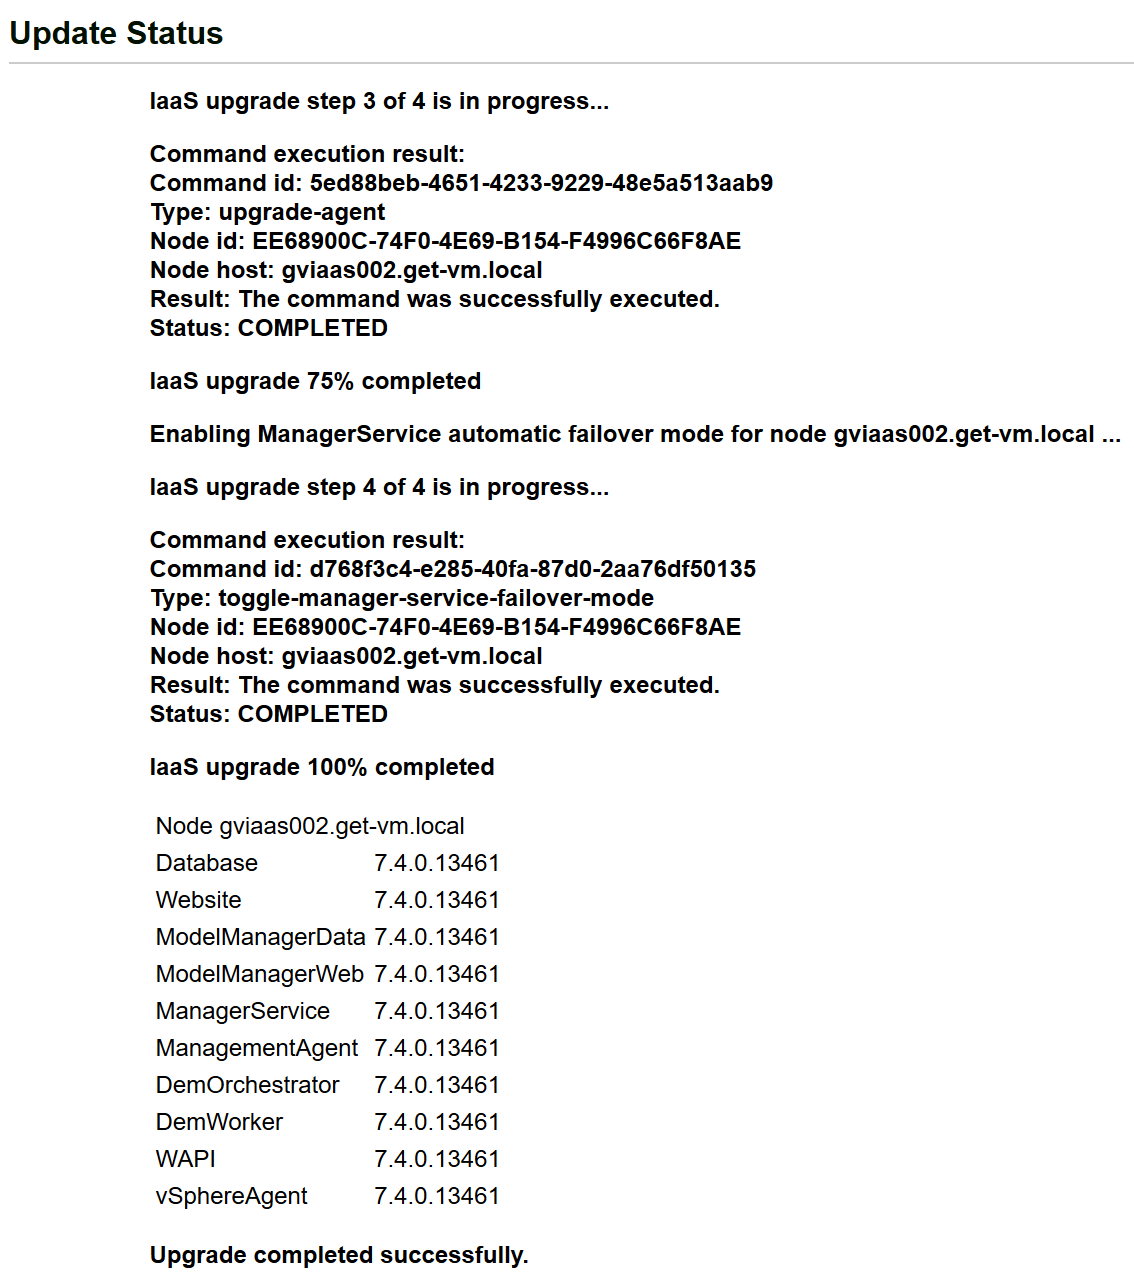
I planned to skip past 7.3.1 and go directly to 7.4. I downloaded the vRA 7.4 ISO file, attached it to the appliance’s CD-ROM drive and clicked check updates from the CD-ROM. Unfortunately, the error “No update found on 1 CD drive(s)” was given. I soon decided to skip that and let the appliance upgrade to 7.3.1 first. That upgrade went smoothly without any issues.

The Issue

Next up was the vRA 7.4 upgrade. I took another round of snapshots and went back into the appliance management and initiated the 7.4 install. The vRA appliance upgraded to 7.4 and asked for a reboot. The appliance rebooted and came back online. After waiting a very long time for the IaaS components to begin their upgrade I noticed an issue with some appliance services. The vCO service did not have any status while the following services were “UNAVAILABLE“:

advanced-designer-service
o11n-gateway-service
shell-ui-app

Services Unavailable

I dug into some logs and found WARN events surrounding the unavailable services. In those events, I noticed the following error: “Unable to establish a connection to vCenter Orchestrator server.” Therefore, I needed to figure out why the vCO service was not starting. Once I could get it to start, the others would register successfully. I checked the logs for the vCO services and found the following error:

 2018-04-14 18:39:16.702+0000 [serverHealthMonitorScheduler-1] WARN {} [LdapCenterImpl] Unable to fetch element "vsphere.local\vcoadmins" from ldap : Error...:[404 ][javax.naming.NamingException]
2018-04-14 18:39:16.702+0000 [serverHealthMonitorScheduler-1] ERROR {} [AuthenticationHealth] Unable to find the server administrative group: vsphere.local\vcoadmins in the authentication provider.

The Resolution

This is an immediate smoking gun for my configuration. I set up the vRO admin group to use a group within my Active Directory. Therefore, the local group, vcoadmins, was not present and prevented the vCO service from registering with vRA. I changed the vRO admin group to my AD group and rebooted the appliance.

vRO Admin Group

All of the services registered successfully and the IaaS upgrade process began. The vRA 7.4 upgrade completed shortly after that without any further issues.

Upgrade Complete

However, I don’t know why the vRO admin group was changed to vsphere.local/vcoadmins during the 7.3.1->7.4 upgrade. Luckily it wasn’t too big of an issue to fix but annoying to say the least.

April 11, 2018
by zach
1 Comment

Import Python Modules for use in an Azure Function

Azure Functions is a “serverless” compute service that supports multiple programming languages. Some languages are officially supported, while others are in preview. Azure FunctionsI have numerous python scripts that I could push into the cloud to help me learn how to use Azure Functions. Unfortunately, the previewed languages do not have very much documentation out there.  The biggest hurdle was importing python modules for use in an Azure Function.

Azure Functions uses the App Service on the back-end which allows you to customize your application environment with the help of Kudu. I found some documentation across multiple sites that had aged a bit. Not a single how-to post or guide had all of the answers. The inaccuracy of the guides I found may be from the preview nature of the language support. This is not surprising as Python is in preview. After lots of trial and error, I found a method that worked for me.

Create a Function App

First, create a new Function App. 

Create a New Function App

Confirm the function app is up and running.  Then click the + sign next to functions to add a function to the app. 

Create a New Function

The center pane will ask for a scenario and language to assist with a premade function. Since we are using python for our language, a custom function must be selected to proceed.

Create Custom Function

The next screen provides templates to use to get started. However, to use python, the “Experimental Language Support” switch needs to be enabled.

Enable Experimental Languages

After selecting Python, only two options (HTTP trigger and Queue trigger) can be selected. For this demo, I will select HTTP trigger. I left the defaults for this example. 

HTTP Trigger

Update Python Version

Now that we have a function in the app, the python version needs to be updated. The python version that is installed is old and conflicted with my scripts. This may not be the case for your scripts but if you need to update to a specific version of python, this will assist in that process. My scripts were written for Python 2.7. I need to fix my scripts to support Python 3.6 but that will come at a later time. To get started, We need to access the Kudu tool. Click the Function App name on the left, then Platform features at the top, and then “Advanced tools (Kudu)” near the bottom of the center pane.

Azure App's Kudu

To update the Python version, click the Site extensions at the top.

Click the Gallery tab. Then type in Python in the search. The results will provide multiple versions of Python available to be installed. Pick your desired version. 

I need Python version 2.7.14 x64. Click the + sign to install the extension into your environment. The install icon will show an animated loading icon while it is installing. Once it is finished, a X icon will be present in the upper right of the tile. Take not of the path where this version of python is installed. It will be needed later.

Now that our desired version of Python has been installed, the Handler Mappings need to be updated. Go back to the Function App’s Platform Features page. Then select “Application settings.”

Application Settings

A new tab is shown in the center pane. Scroll to the bottom to the Handler Mappings section. A new mapping needs to be added. Click “Add new handler mapping” and enter the relevant settings for “fastCgi” handler mapping for the version of Python you installed. The path is shown on the tile when you installed the different version. My handler settings were as followed:

fastCgi ->D:\home\python27\python.exe -> D:\home\python27\wfastcgi.py 

Python fastCgi Handler Mapping

Scroll to the top of the Application Settings page and click Save.

You can test the version of Python being used by replacing the code in the run.py file with the following code:

import os
import json
import platform
postreqdata = json.loads(open(os.environ['req']).read())
response = open(os.environ['res'], 'w')
response.write("Python version: {0}".format(platform.python_version()))
response.close()

When the above code is run, the output returns the Python version. My example returns the correct version from the site extension I installed.

pyVersionRun

Create Virtual Environment

Next, a virtual environment needs to be created. This is where the Python modules will be installed. Head back to the Kudu tool and click the “Debug console” dropdown and click CMD.

Kudu Powershell

At the top, you will see a directory structure that can be used for navigation. First, the virtual environment module needs to be installed as it does not seem to come with the updated version of Python that was installed previously with the site extension addition. Run the following command: “python -m pip install virtualenv”.

Install Virtual Env

Now that the virtualenv module is installed, it is time to create a new virtual environment. Navigate to the following directory: “D:\home\site\wwwroot\{yourFunctionName}”. Then in the console type the following: “python -m virtualenv yourenv” where ‘yourenv’ will be the name of the virtual environment that you create.

Create Virtual Env

Once the virtual environment has been created navigate to “yourenv\scripts” and run activate.bat. This will activate your virtual environment and place your active console in it. You can see if it is active as it the environment name precedes the path as shown below.

Enter Virtual Env

You now have access to run python commands that allow you to install modules and configure your Python environment to your needs. 

Install Python Modules

Installing modules through PIP is recommended. However, I ran into an issue where PIP would not install a couple modules I needed.  I recommend attempting to install using PIP first, as I did with ‘lxml’ below.

lxml Install

I have received an error while installing modules that indicates it needs the vcvarsall.bat file that is included within the Microsoft Visual C++ 9.0 package. If you do get this error, you can manually download the “wheels” that contain the module you need to install. The best site that I found that can direct you to the official wheel files is www.pythonwheels.com. From there, you can find the module you need. Select the correct version of wheel that is specific to your environment (2.7, 3.6, x86, x64, etc.). You also need to install the wheel module before you import these wheel files (python -m pip install wheel). 

Now that wheel is installed and you have downloaded the correct .whl file for your module, you can simply drag and drop the .whl file from your desktop into the following folder: “D:\home\site\wwwroot\{yourFunctionName}\{yourenv}\Lib\site-packages.” It will unpack the .whl file automatically and make it available. 

Once you have installed all of your modules, run “pip freeze” to discover the modules that are installed. I installed bs4, lxml, and requests. They naturally installed a few other modules as dependencies.

List Installed Python Modules

Import Modules Within Your Script

I know this has been long, but you’re almost done! The last thing to do is let Python know where your modules reside so it can correctly import them into your scripts for use. At the top of you script(s), enter the following code:

import sys, os.path
sys.path.append(os.path.abspath(os.path.join(os.path.dirname( __file__ ), 'yourenv/Lib/site-packages')))

Ensure you replace “yourenv” with whatever you chose to name your virtual environment. 

After that, your script will be able to import any Python module it needs and complete successfully.